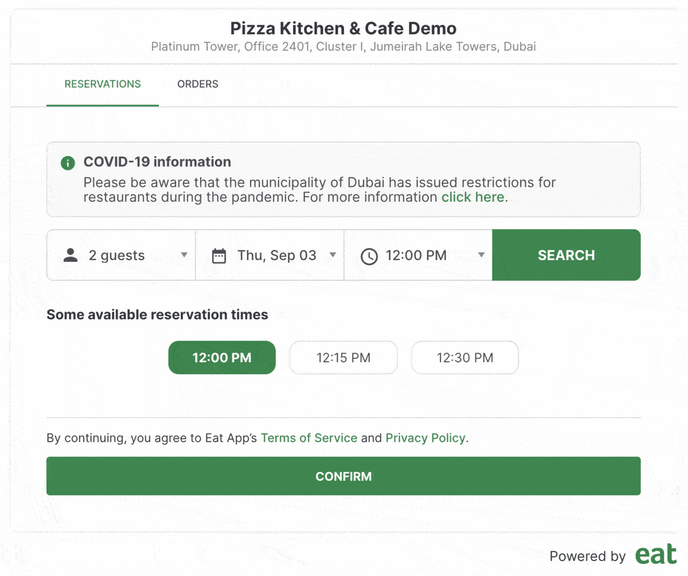
Your booking widget is an extension of your online brand identity and should provide a seamless experience for your customers from the moment they land on your website to the moment they've made their reservations.
Accessing your widget configuration
To customize your restaurant booking widget, start by navigating to the settings tab from the bottom left-hand side corner of Eat App and then click "Widget Configuration" under Online reservations.
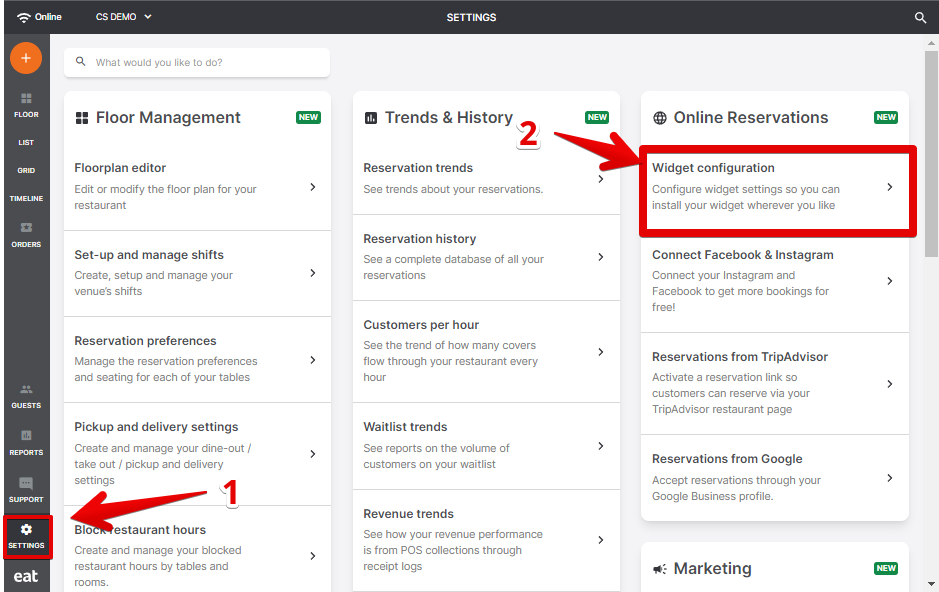
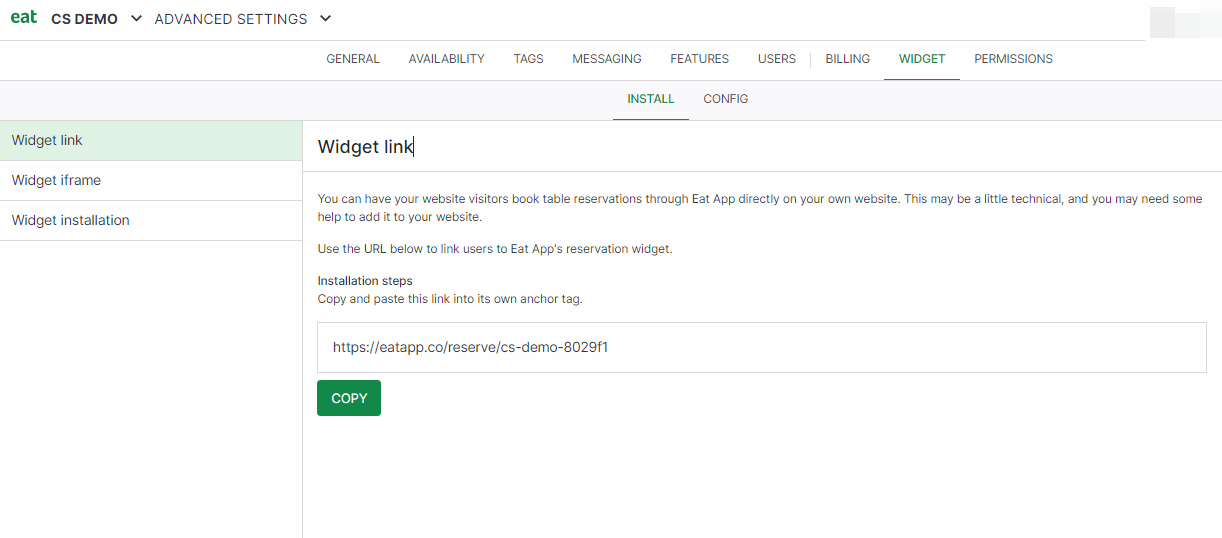
From here, you'll be able to easily access your booking widget link, your booking widget iframe code to embed on your website as well as the "Config" tab which contains all your widget's customizable settings and features.
Setting up a widget configuration
Once in the "Config" tab of your advanced settings, click the "Add New Widget Config" button on the bottom left-hand side. This will allow you to create a custom widget setup that you can choose to toggle on or off at any given time.
Create multiple widget configurations for different use cases in advance and cycle between them when needed.
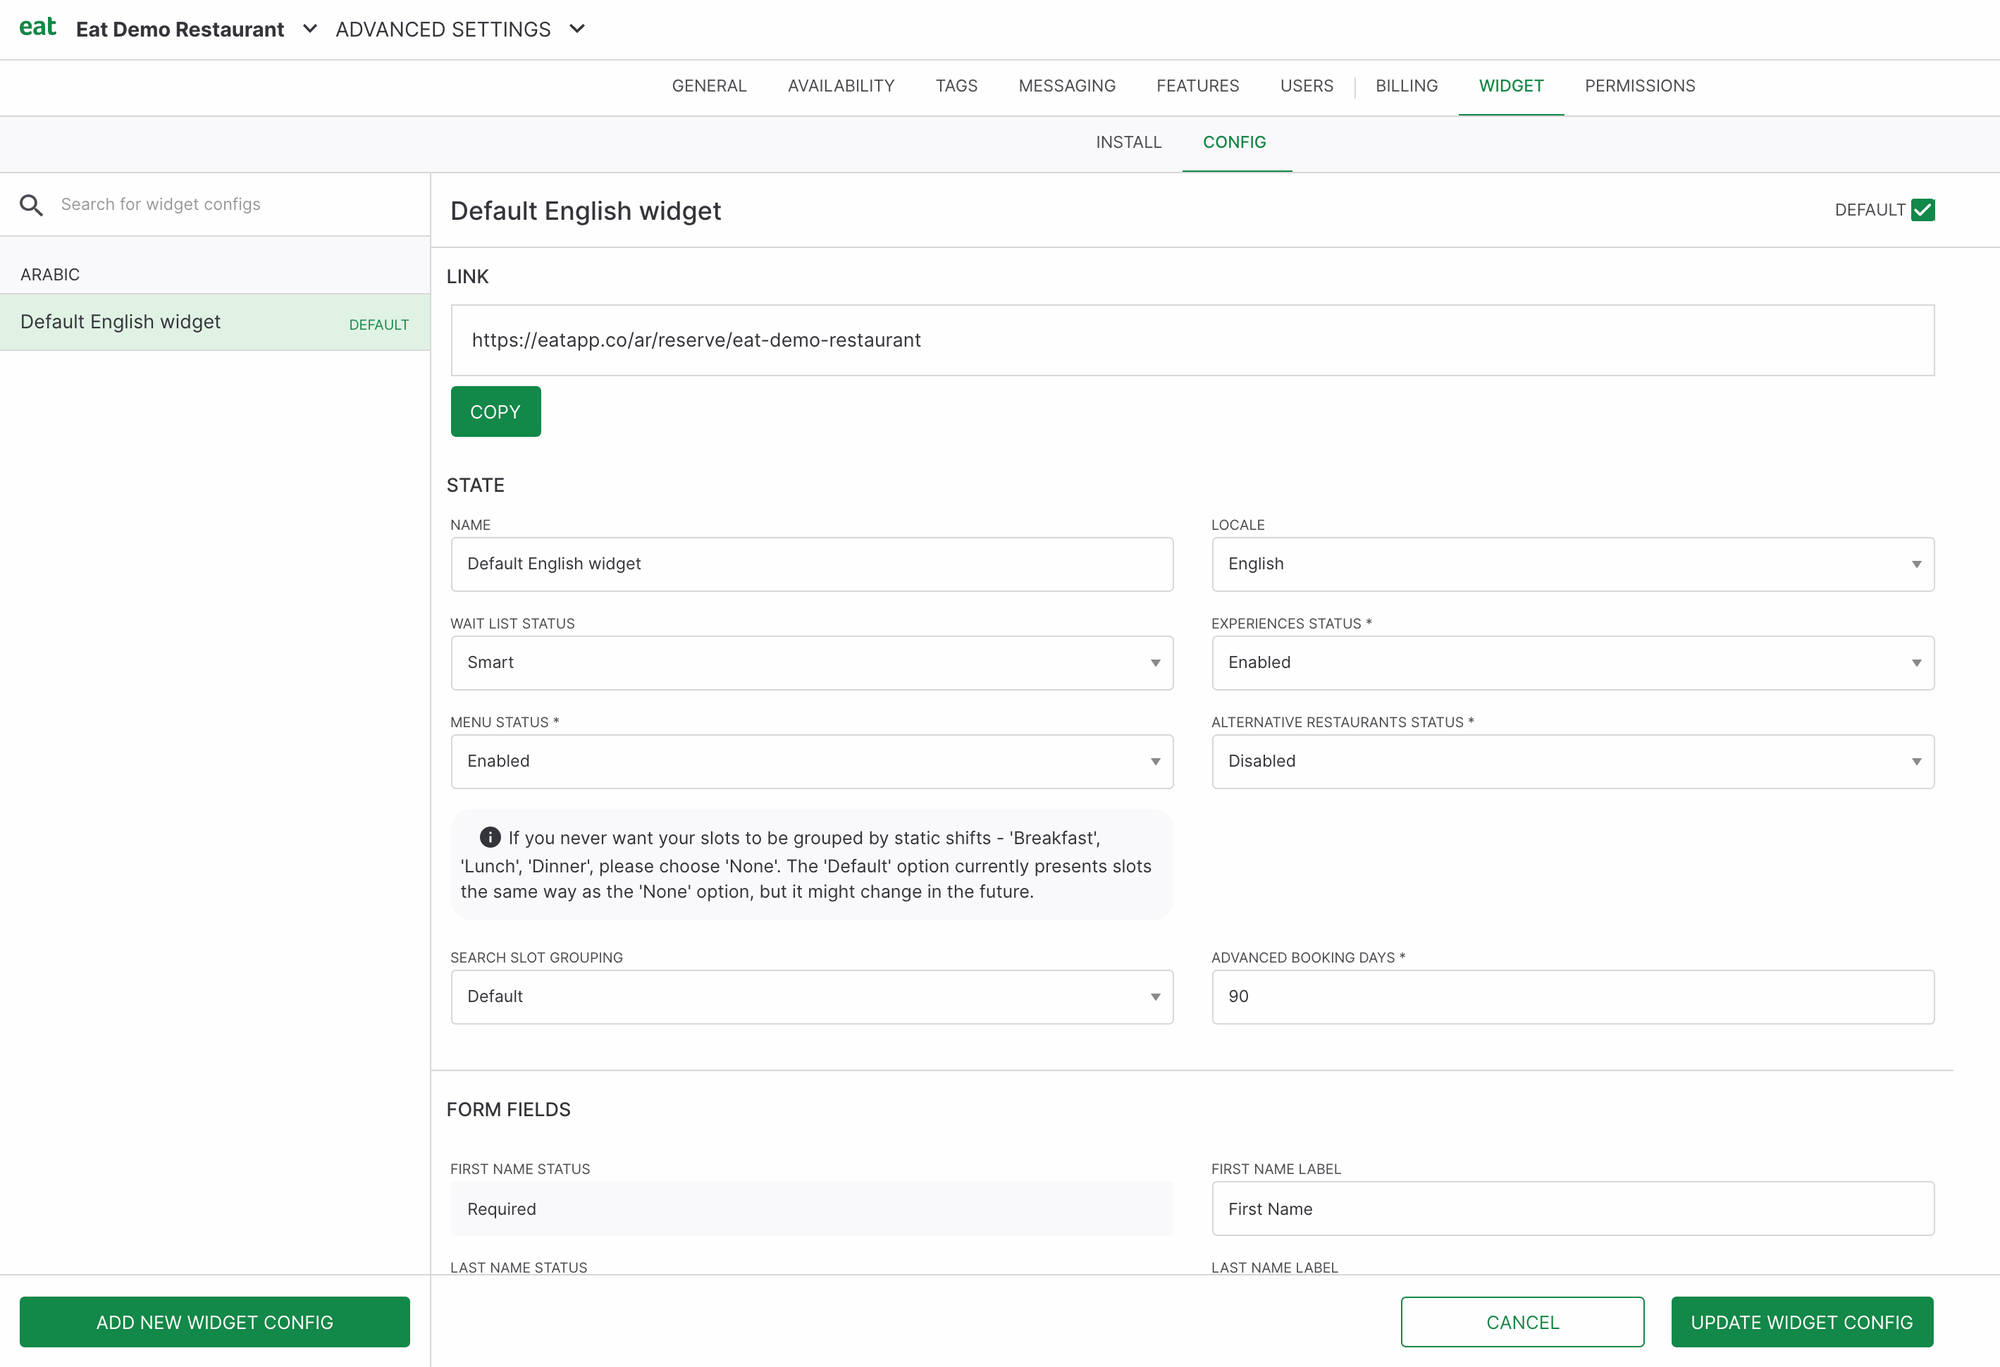
From the widget configuration settings, you'll be able to assign
- Name: the internal name for this specific widget confirmation. For example "Summer Widget"
- Waitlist Status: define whether or not you want your guests to be able to access your waitlist from your widget
- Experience status: if your restaurant is running any special promotions or events you can choose to display this on your widget
- Menu: if your restaurant has uploaded a menu to Eat App, you can choose to display this on your widget
- Alternative Restaurant Status: if your restaurant is part of a group, you can choose to offer your guests with alternative options when booking a table.
- Search Slot Grouping: this defines how your time slots will be displayed on your widget.
- Advanced Booking Days: this allows you to set how far in advance a customer can book a table at your restaurant
- Form Fields: this section of the widget configuration will allow you to toggle which fields show up on your widget when a customer wants to create a reservation
- Tag Selector One/Two: in addition to the custom fields on your widget you can also toggle on dropdowns to have your customers select certain preferences like allergies or special occasions. This will display all the tags you've set up in the category you've chosen
- Terms: this section allows you to enter custom terms and conditions that show up either at the start of the booking process or once a customer has already made a booking. This is where you can input anything from your cancellation policy to your restaurants dress code
- Styles: this is where you'll be able to select a custom font for your booking widget as well as match your widget to your brand colors
- Booking unavailability message: What message your customers see when the booking is unavailable
- Which order the preference can be selected: Should it be selected above/before or below/after the time?
- A Google GA4 Key: Which key do you want to set to track your GA4 Tracking?
When you've set up your widget configuration make sure to click the green "Create Widget Config" or "Update Widget Config" button.
You can toggle widget configurations on or off using the toggle on the top right corner of any widget configuration.