What is a Chit Printer?
It is a device that prints guest reservations details such as tags, notes, and private comments as well as guest preferences on a slip. Businesses often need this technology to ensure clear communication between hostesses, waiters, the kitchen and other restaurant staff. This helps restaurant staff to manage guest preferences in the kitchen as well as in the seating area.
Restaurant staff work in a busy environment where mistakes can quickly snowball into kitchen backups and long wait times for tables. A chit printer system reduces the need for staff to decipher someone’s handwriting which leads to fewer mistakes, faster service and more table turns.
Index
- Why you should get a chit printer
- Support Chit Printers
- How to Set up your chit printer (Bluetooth)
- How to Set up your chit printer (PC - Network)
- How to set up your chit printer (PC - USB)
- How to Set up your chit printer (Mac)
- How to print a reservation
- How to factory reset
Why you should get an Eat App Chit Printer for your restaurant?
 Identify guest preferences and tags faster. Save time spent walking back and forth in communication. Increased efficiency: The Chit Printer can help you and your team communicate more efficiently, reducing the time you spend walking back and forth. Improved accuracy: The Chit Printer can help you provide more accurate communication by providing a clear and concise record of guest preferences. Enhanced customer service: The Chit Printer can help you provide better service by ensuring that your guests' needs are met promptly and accurately.
We recommend using the Eat App chit printer for superior speed and connectivity. The Eat App chit printer has been developed to solve common issues with existing chit printer solutions. The Eat App chit printer is a cost effective way to get the most streamlined experience. For details on pricing please contact your account manager or sales rep today. Alternatively please email sdr@eatapp.co for further information.
_______________________________________________________________________________________________
Supported Chit Printers
See below the list of chit printers that Eat App supports
- Eat App's chit printer (order by pressing on the print button in a reservation)
- Zywell ZY307
- Star Micronics TSP143IIIBI (available from most web stores)
- EPSON (support in development)
How to set up for Bluetooth Chit printing
Pairing your iPad with an eat chit printer
- Open Eat App and tap on the 'setup' button on the left-hand side.
- Search for "Chit" and select "Chit printing settings"
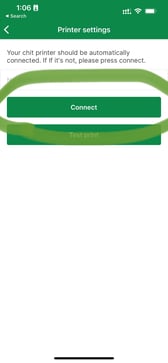
- Press Connect
- If you've done everything correctly, your printer name should appear at the top.
- Tap on “Test Print” to print out a sample reservation.
Using Your Chit Printer
Navigate to "Floor View" and select any upcoming or seated reservation. Tap the printer icon to instantly print out reservation details.

Watch the videos below to see how it works for both iPad and also mobile devices.
Chit Printing on iPad


Chit printing on mobile phones
iOS and Android platforms are both supported too.
Instructions
- Make sure Bluetooth is turned on
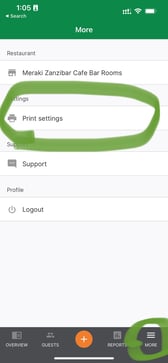
- Go to ‘more’ -> ‘print settings’ -> ‘connect’
How to set up your chit printer via the network for desktop Mac printing
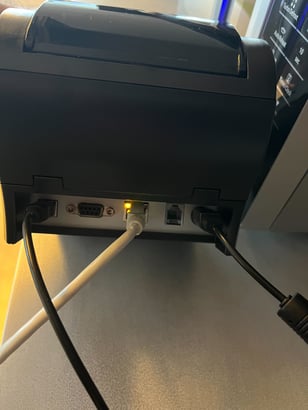
- Make sure your chit printer is plugged in and turned on.
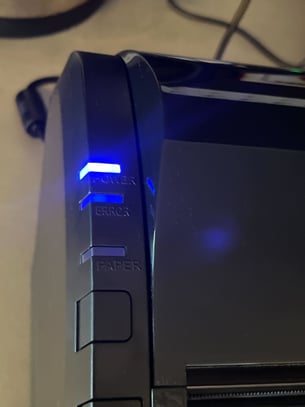
- Plug in the network cable that is connected to your internet router or network and make sure the orange light is on (the green light may be blinking and that's fine).
- Make sure your chit printer has the USB cable connected from the chit printer to your mac or PC (this can be found in the box). You should see that these 3 cables are plugged in.
- Install the chit printer drivers on your PC or mac.
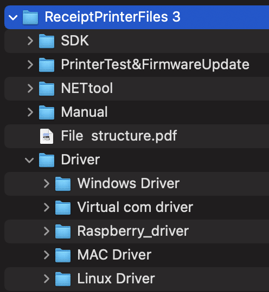
- Download the drivers here and see the below image for the respective folders of your operating system (mac or windows for example).
- Follow the installation instructions for the drivers.
- on a Mac, you can install the software from here
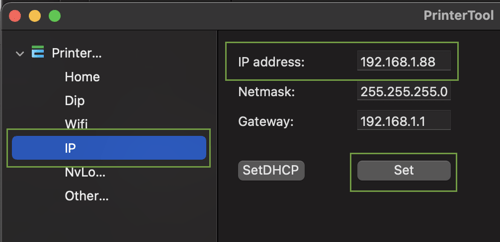
- Open the utility and select USB and press connect
- Switch to the 'IP' tab and set your 'IP address' to something unique (I am using 192.168.1.88 in the example). You should not need to touch the other settings.
- Press set
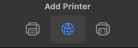
- press command + space and search for printers and scanners and click on printers and scanners

- press add

- select network tab
- type in the IP address you set earlier

- click the 'use' drop-down and click 'select software'

- click the 'POS-80' option

- Press 'ok' and press 'add'
- You should now be able to press 'command+p' and select the printer and print.
- press command + space and search for printers and scanners and click on printers and scanners
- Download the drivers here and see the below image for the respective folders of your operating system (mac or windows for example).
How to set up your chit printer via the network for desktop PC printing
Here are the steps to setup for PC:
- Plug in the USB cable and the network cable to make sure you can start the setup

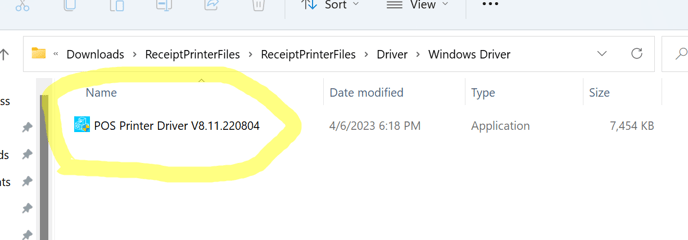
- open up the 'POS Printer Driver Vxxxxx' exe and see if the port check has an IP address.
- If it says 'Searching IP' continuously, you need to set an IP for your device.
- Set an IP on the device by opening the 'PrinterTest&FirmwareUpdate' folder and the 'PrinterTestVxxxxx' exe.

- Make sure you have 'USB' Port Select
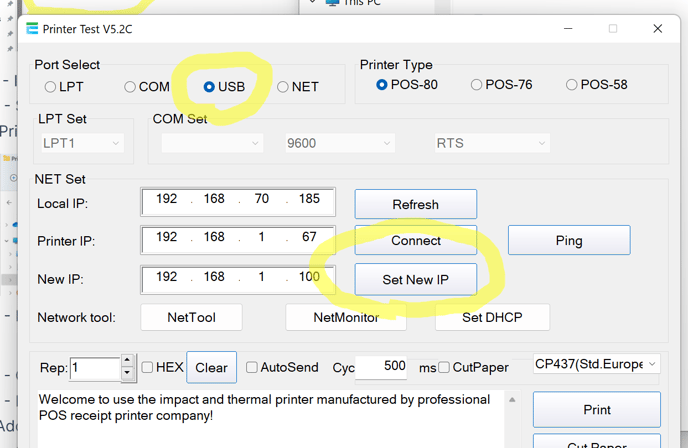
- Click 'Set New IP Address' this will reboot the device
- Now go back to the driver install utility and you should see that Port Check has an IP Address
- Click Install Driver, you will see that the IP address gets printed out on the chit printer
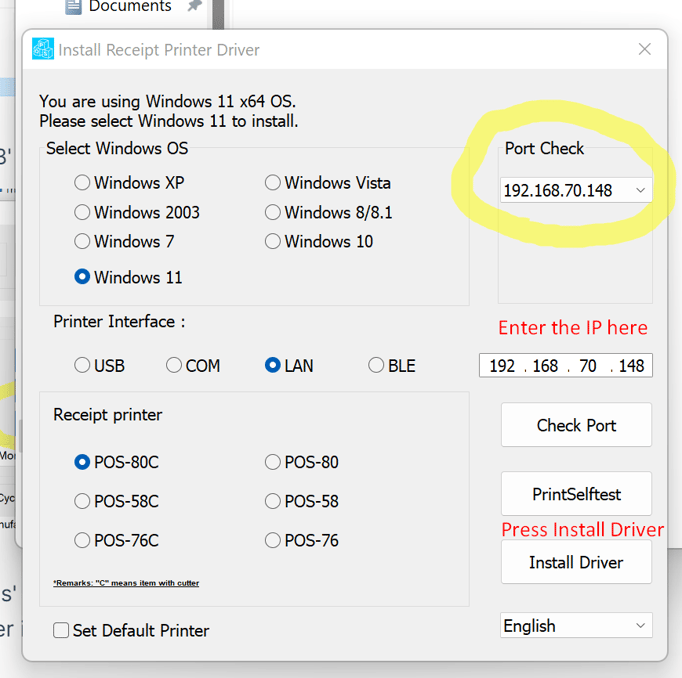
- It will ask you if you want to perform a test print page. Unplug your USB cable and press yes.
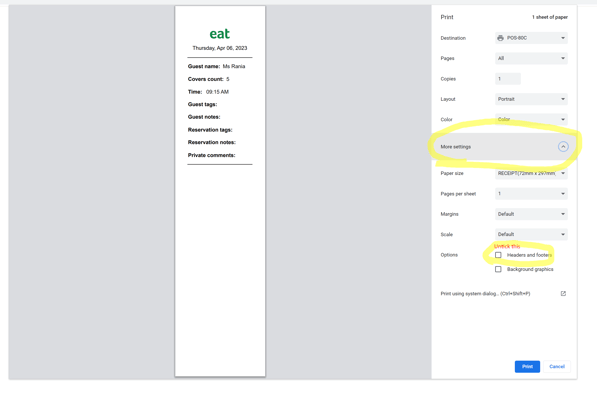
- Try printing out a POS ticket! (Untick 'print headers and footers')

How to set up chit printing via USB cable
- make sure the usb cable is plugged in from the chit printer to the desktop computer
- Go to downloads and find the printer driver download and open the utility in the screenshot shown below:
- They'll see a screen that has an install button like the screenshot below ; they need to make sure the USB checkbox is selected, that USB001 or higher is showing up on the top right and 'POS-80' is selected
- You should press install and it should tell them its successfully installed. It should ask them if they want to print a test printout.
- You need to make sure that when pressing print on eat app, that you are selecting the newly installed POS printer from the options. It's usually called 'POS-80' or 'POS-80C' by default. Make sure to remove printing of header and footer to ensure the receipt is printed the right size. You may also change the scale of the printout to fit your needs as shown in the screenshot below.

How to set up chit printing via Bluetooth
- make sure bluetooth is turned on for your computer
- Go to downloads and find the printer driver download and open the utility in the screenshot shown below... Or if on windows, you can just download the 'POS Printer Driver exe' directly from here
- You'll see a screen that has an install button like the screenshot below ; they need to make sure the USB checkbox is selected, that USB001 or higher is showing up on the top right and 'POS-80C' is selected
- You should press install and it should tell them you it is successfully installed. It should ask them if they want to print a test printout.
 You need to make sure that when pressing print on eat app, that you are selecting the newly installed POS printer from the options. It's usually called 'POS-80' or 'POS-80C' by default. Make sure to remove printing of header and footer to ensure the receipt is printed the right size. You may also change the scale of the printout to fit your needs as shown in the screenshot below.
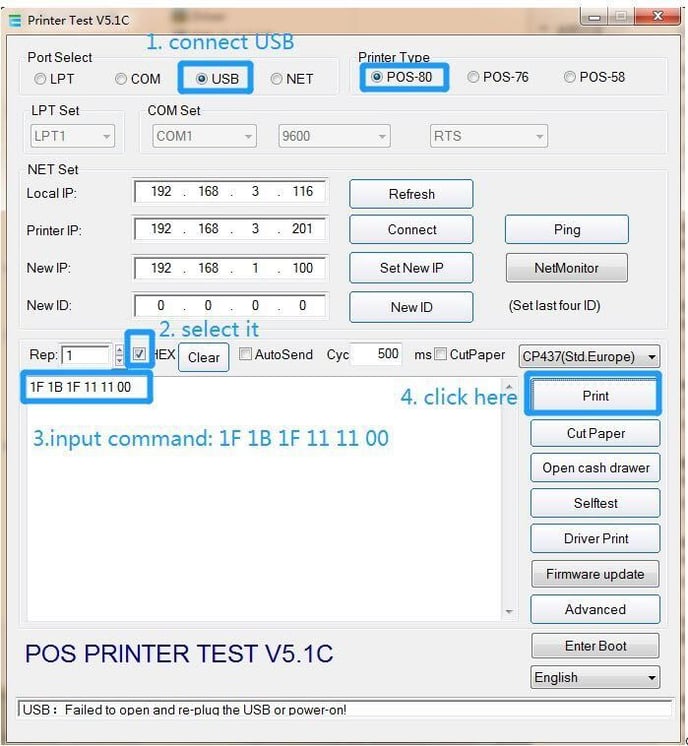
How to Factory reset your chit printer
- open the 'PrinterTest&FirmwareUpdate' folder and the 'PrinterTestVxxxxx' exe.
- Follow the steps in this image: