![Eat App Logo - Small.png]](https://restaurant.eatapp.co/hs-fs/hubfs/Eat%20App%20Logo%20-%20Small.png?height=40&name=Eat%20App%20Logo%20-%20Small.png)
This guide shows you how to use the Floor Plan Importer to upload an existing floor plan image or PDF and have Eat App automatically generate a room with tables
Prerequisites
- Floor plan management access on your Eat App account
- A floor plan file in PNG, JPG/JPEG, or PDF format
- The file should show one room per file. If your restaurant has multiple rooms or floors, split them into separate files before importing (see Common Issues below)
- For best results, use a floor plan with a light background and clear, high-contrast table outlines
1. Start a new import
On the left side bar, navigate to View > Import Floor Plan. This opens the import wizard in a focused, full-screen view.
2. Upload your floor plan file
Drag and drop your file, or browse to select it. Accepted formats are PNG, JPG/JPEG, and PDF.
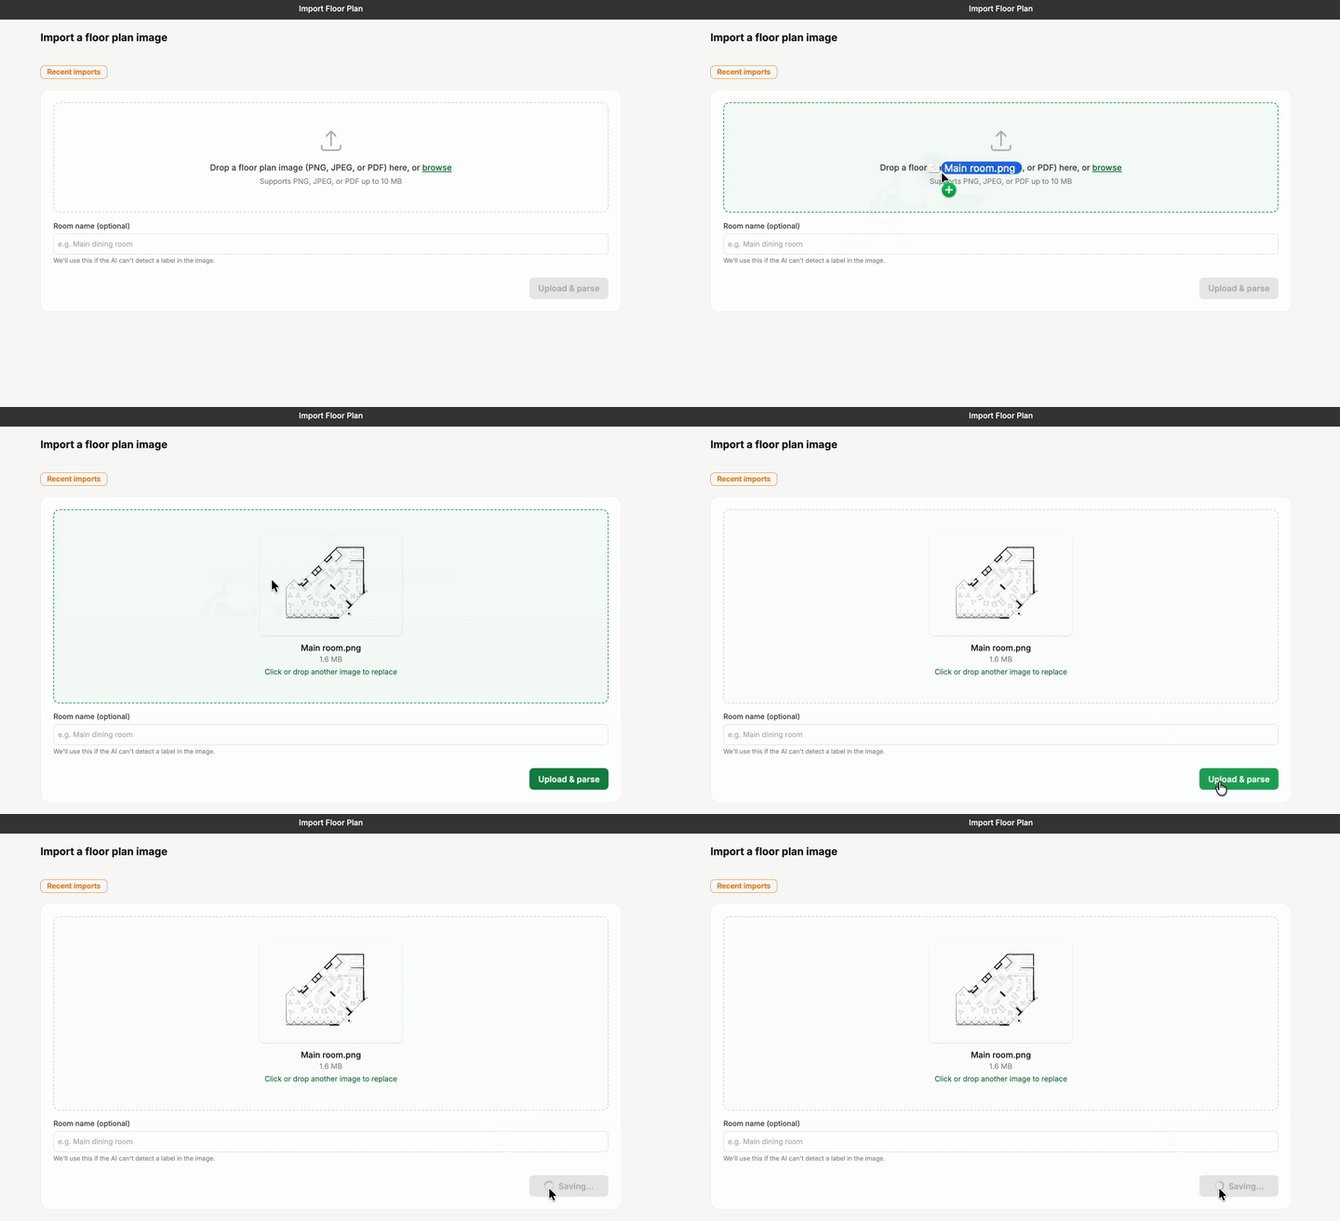
3. Let Eat App generate your tables
Once the file uploads, Eat App scans the image and automatically detects your tables, their shapes, and seating capacities. It builds a room made up of the tables it found.
4. Review the generated tables
Check the generated layout against your actual floor plan. Remove any tables that were detected incorrectly.
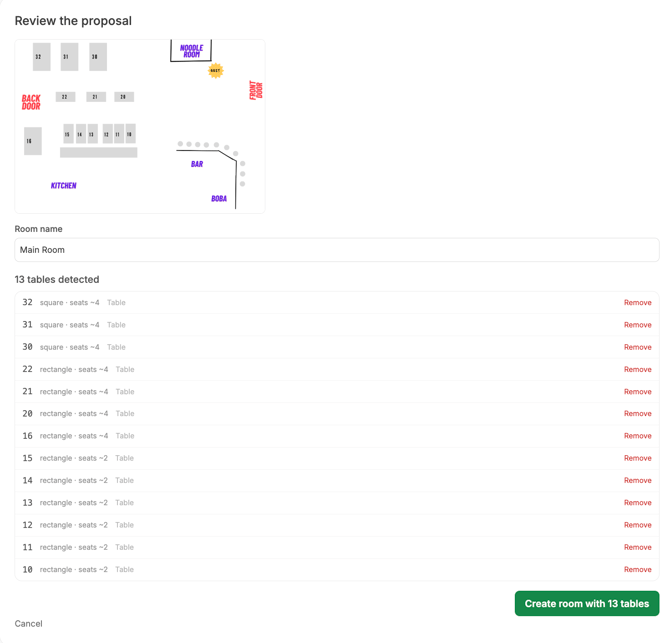
5. Confirm the import
Select Create room with X tables to finish. The new room and its tables are added to your floor plan.