Preference feature enhancement: You can now easily block other preferences from overlapping with an active preference.
This is useful for preventing conflicting options from appearing at the same time, such as seasonal events, exclusive areas, special packages, or limited-time seating preferences.
Creating and promoting reservation preferences and events in Eat App is simple and flexible. This guide covers how to:
-
Display preferences and events in a scrollable gallery on your widget
- How to block other seating options or events
Reservation preferences allow guests to select their seating or booking preferences during the reservation process. Common examples include:
- Indoor vs. Outdoor seating
- Smoking vs. Non-Smoking sections
- Specific dining areas or sections
Create a Reservation Preference or Event
Before creating a reservation preference, make sure your restaurant shifts or availability have already been set up. Preferences will only appear on the booking widget during time slots that are available through your configured shifts.
The date and time settings on the reservation preference do not create availability on their own. Instead, they control when the preference is shown on the booking widget, as long as those time slots are already available based on your shift settings.
To ensure the preference appears correctly, make sure the preference date and time range matches the shift periods during which you want guests to see and select it.
To get started, open the left side menu:
- In the Table Manager, go to Availability, then select either Events & Packages or Seating Options
- Click Add New Preference, and provide the information below:
-
Name — Internal preference or event name, visible only to your team
-
Display Name — The name guests see on the booking widget
- One-time — Shows only for the selected date/s and time
- Recurring — Repeats on selected days of the week
Preference Availability — Defines when the preference or event appears
-
Days of Week — This setting determines which days of the week the preference will be available
-
-
Block Other Preferences From Overlapping This One — Hides other preferences during the same date or time period
-
Start and End Date/Time — Sets when the preference or event is shown on the widget
-
Availability Type — Defines how capacity is managed
-
Tables — Choose Tables to apply the preference to specific tables only. Guests can book this preference only when one of those tables is available.
-
Volume — Choose Volume to limit bookings by total covers instead of specific tables. Use this when table assignment is flexible but capacity still needs to be controlled.
-
-
Custom Reservation Duration — Uses a custom duration or your shift’s default duration
-
Notice Period — Uses a custom notice period or your shift’s default
-
Image — Upload a photo for the seating option / dining area or event
Image Text — Add text within or below the image
-
Preference Visibility
-
Public — Visible on the booking widget
-
Private — Only accessible through the direct preference link
-
-
Tables — Required if Tables is selected as the availability type
-
- Click Create Preference to save the changes.
To disable a preference, simply uncheck Active and click Update.

Mandatory Booking Preference
When this setting is disabled, the booking widget will include No Preference as an option in the list of reservation preferences. If selected, the reservation can be assigned to any available table in the restaurant.
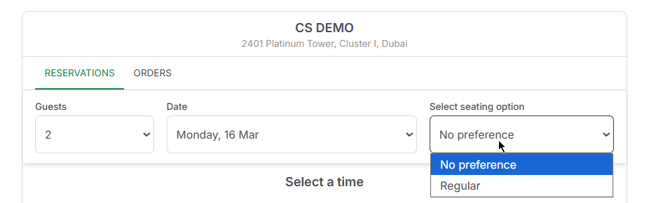
To require guests to select a preference and remove the No Preference option, enable Mandatory booking preference if any.
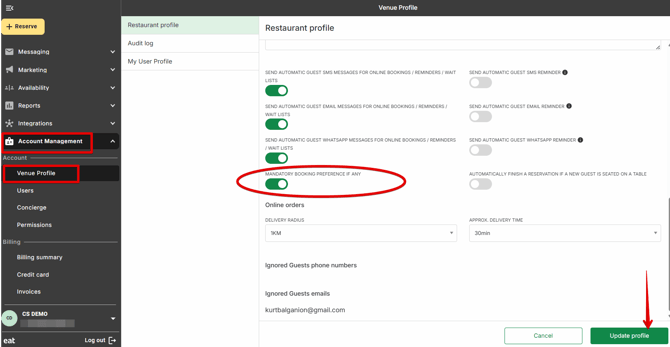
- Go to Account Management → Venue Profile.
- Toggle ON: MANDATORY BOOKING PREFERENCE IF ANY.
- Click Update Profile to save the changes.
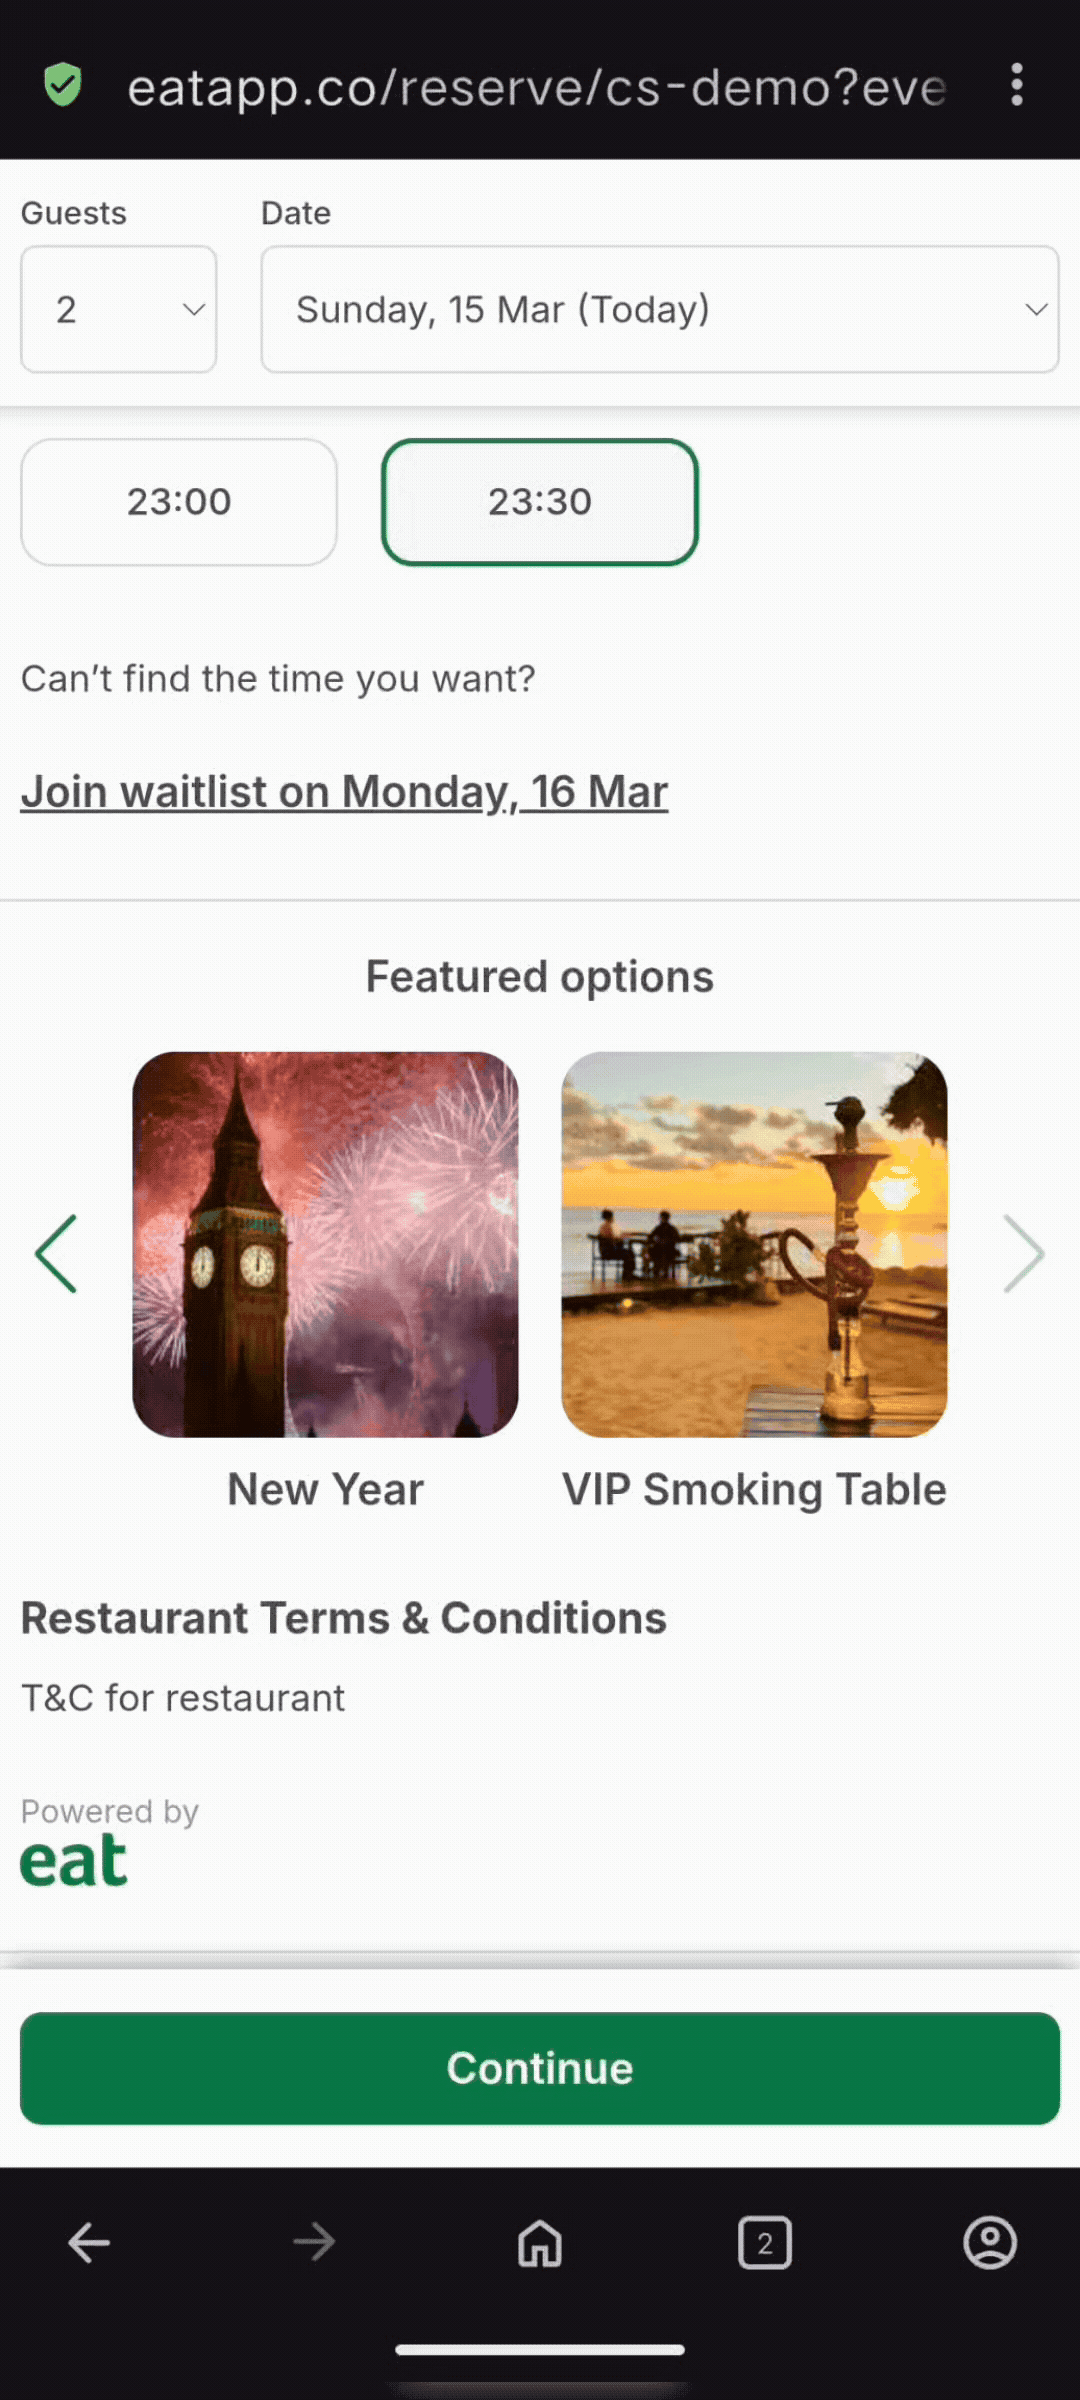
Advertise preferences/events in a scrollable gallery
- Enable the scrollable gallery on your widget:
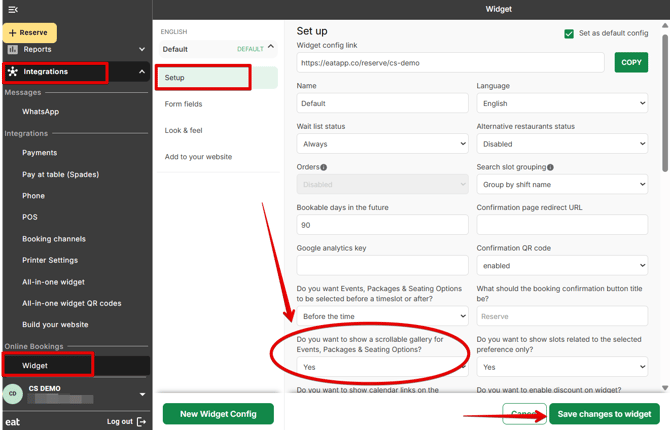
- Go to Integrations → Widget → Setup
- Set Do you want to show a scrollable gallery for Events, Packages & Seating Options? to YES
- Click Save changes to Widget
- Enable the event / preference to be shown as featured option or in the scrollable gallery
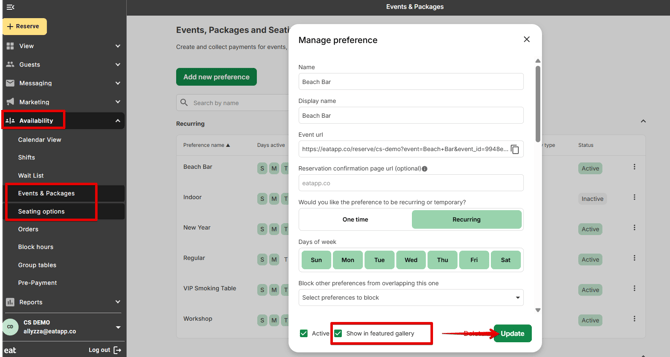
- Go to Availability → Events & Packages or Seating Options
- Select the event you'd like to be shown in the scrollable gallery
- Check the box for Show in featured gallery
- Click Update
- Check the scrollable gallery on your booking widget
- Go to Integrations → Widget
- Click Go to widget button under the widget preview
Block Other Preferences
Preference Blocking allows you to hide or block other reservation preferences that are active during the same date or period.
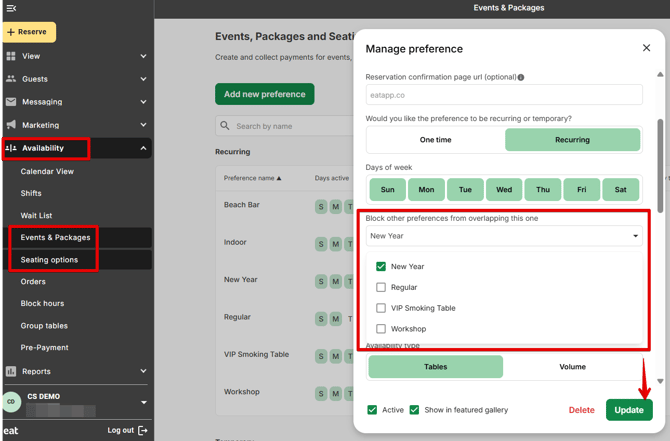
- Go to Availability → Events & Packages or Seating Options
- Select the preference you want to keep active. Then, under Block other preferences from overlapping this one, check the preference or preferences you want to block whenever it is available.
- Click Update to save the changes.