In this article, you'll:
- Have better understanding of the reservation types
- Learn how to create in-house reservations
- Be able to quickly create reservations across different views
You can create and manage reservations in Eat App in two ways:
Reservation types
-
Online reservations: made by guests through your booking widget or the Eat reservation network. These reservations automatically appear in Table Manager, where you can view, edit, and manage them.
-
In-house reservations: created manually by you or your staff (for example: walk-ins, phone calls, or email requests). You can create an in-house reservation at any time by clicking the + Reserve button in the upper-left corner of Table Manager. You can create in-house reservations from any reservation view in Eat App.
How to Create an In-House Reservation
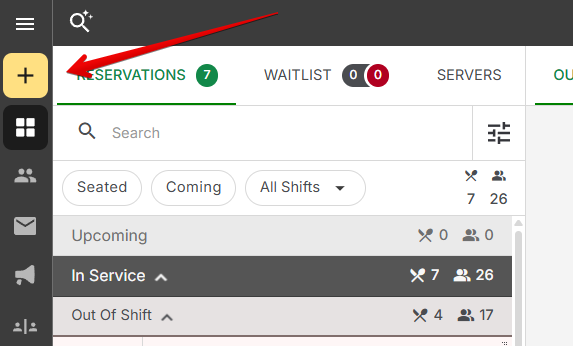
To create a reservation, click the Reserve button (top-left) from any view, then fill in the details below.
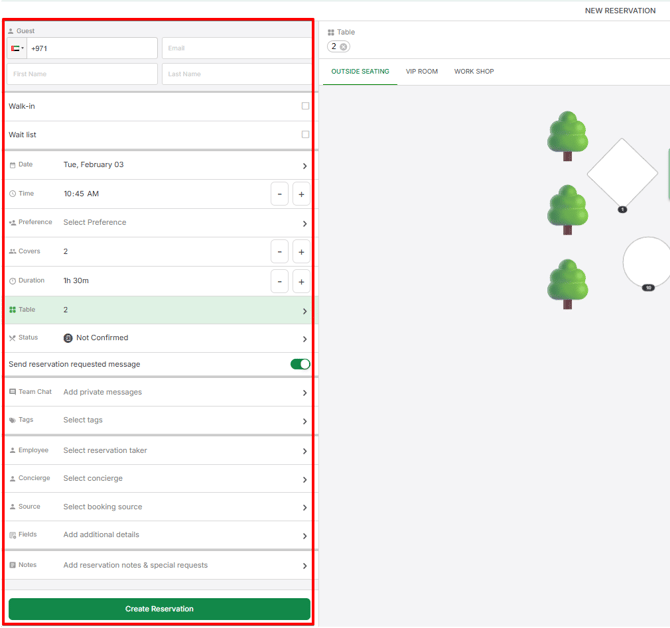
Guest name
You can:
When searching for a guest, you can view results in two ways:
- List view: shows guest names and contact details
- Card view: shows guest details plus reservation history
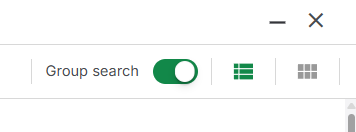
If you manage multiple restaurants in Eat App, you can also enable Group search, found at the upper left side, to look up guests from another restaurant.
In-house reservation types:
Choose the type of reservation:
- Walk-In: for guests who arrive without booking online or by phone. This also helps track or breakdown of bookings from walk-ins vs reservations.
- Waitlist: for guests you want to add to the waitlist
Date: The reservation date. You can also use the date toggle to select dates in the future before creating the reservation.
Time: Select the reservation time using the time selector, or type it manually.
Preference: If a preference has been set up, choose one.
Covers: Set the number of guests for the reservation using the selector or by typing it manually.
Duration
- Duration is automatically suggested based on party size
- You can adjust it manually
- Duration can also be predefined by shift settings
Table
- Click on one or more tables from the floor view on the right to assign a table/s to this reservation
- You can also switch between rooms using the room selector
Status: By default, reservations are set to "Not confirmed" but you can change the status manually
Send Message: If the reservation is marked as Not Confirmed or Confirmed, you can enable Send Message to send reservation notification to the guest when the reservation is created.
Team Chat: A private communication section that is not visible to guests. Messages sent here are for internal use only. This is a great way to stay updated on any changes or important details.
Tags: Assign tags to a reservation such as "Anniversary" or "Birthday".
Employee: If reservation takers are set up in the account, select your name or staff member's name who took the reservation.
Source:
-
Booking sources are automatically assigned to online reservations based on the channel they came from. For in-house reservations, you can also select a booking source manually to keep your reports accurate.
-
If you need to add more booking sources, please contact our Support team to request them.
Notes
- Add any important notes for the reservation.
- In your Eat booking widget, the equivalent of this field is the Special Requests. These notes are also included in reservation notifications they receive if notes is in your template.
When creating a reservation, you’ll be notified if the details match another reservation on the same day, helping you identify possible duplicates.
Should you want to limit it or prevent any duplicate, you can go to Account Management → Concierge → Settings → Reservations, and update the setup for Allow only one reservation per guest within a time period.
In addition to the following fields, the add reservation process also features tools that may help you make better decisions.
Creating In-House Reservations from Each View
No matter which view you are using in Eat App, you can always click the orange (+) Reserve button in the top-left corner to start a reservation. You can also use keyboard shortcuts.
In addition, some views offer faster ways to create reservations.
Floor View
There are three methods to create a reservation through floor view:
- Click a table

Clicking a table opens its details, including:
- Reservations scheduled for that table
- The assigned server
From there, click Create a Reservation to start a new booking with that table already assigned.
- Create walk-in

To quickly create a walk-in reservation, use the walk-in selector at the bottom of Floor View to choose a party size, then tap a table. This instantly creates a walk-in reservation for that table at the current time.
You can edit the reservation later to add more details.
- Convert from the waitlist
.gif?width=670&height=377&name=convert%20waitlist%20(1).gif)
Guests added through the waitlist can be converted into in-house reservations once a table is available by going Waitlist tab and changing the reservation status, and assigning them to a table.
Grid View
In Grid View, select a party size from the bottom of the page, then click the green reservation button on a time slot.
This opens the reservation form with the selected party size and time already filled in.
Timeline View
In Timeline View, click any empty cell to create a reservation. The table number and reservation time will be filled in automatically.
Guest List
You can also create a reservation from Guests → Guest List. Search for an existing guest, then click the + button in the top-right corner.
This opens the reservation form with the guest already assigned.
