How to add a new user
Learn how to invite and manage your restaurant staff.
In this article:
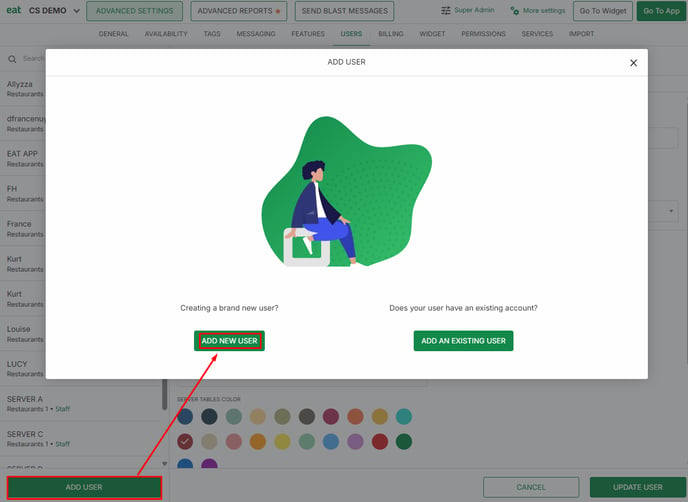
From Table Manager, navigate to the Account Management tab on the left hand side of the page, then click Users.
When adding users to Eat App, you have two options:
- Add New User: This is used when you want to add a completely new user to a specific restaurant.
- Add Existing User: Use this option if you are managing multiple restaurants in Eat App and want the same user to access more than one venue with a single login.
For example, a restaurant manager can be added to all the restaurants they oversee, allowing them to have access to each venue using the same email address.
Steps for adding a new user
- Click ADD USER at the bottom left-hand side.

- Add the name of the staff member (required).
- Add the email that the staff member will use to log into Eat App (required).
- Select the user's role. By default, this is set to "Staff" but can be changed to:
- Manager
- Call center
- Call center manager
- Group Manager
- Configure user functions:
Can login?- Enable this if the user should have their own login credentials (email + password).
- If disabled, the user cannot log in directly using their own credentials but can still be listed as a reservation taker or server in that venue. This setup is useful when you want staff members to be selectable in the system depending on their function, but don’t want them to have direct login access.
- Select this if you want the user to appear as an option when assigning who took a reservation.
- Useful for tracking staff activity without requiring them to log in.
- Select this if you want the user to appear in the list of servers when assigning tables.
- Like reservation takers, they can still be tracked without direct login access.
- Set a password (required).
- Remember or take note of the password you will assign, as it will not be visible while you are entering it, and once the user has been added. You can, however, change the password afterwards by entering a new one and clicking UPDATE USER.
- Assign a pin code. This optional pin code can be used when adding new reservations as an extra layer of security at your restaurant to prevent reservations from being added by users that are not qualified to do so.
- Assign phone extension. If your restaurant uses Eat App’s phone integration, you can assign specific extension numbers to users. This ensures incoming calls are routed directly to the correct staff member.
- Assign a color code to this user to easily identify them in table and reservation views. You can already set it here or update it later.
- Configure additional permissions. Use these options to control user actions and add an extra layer of security:
- Require a PIN for reservation taker
- Require a PIN to refund
- Can refund a payment
- Can see shared guests: If you are managing multiple restaurants and shared guest database is enabled, the user will have access to guest information across all other restaurants
- Can delete shared guests
- Can merge guests: This allows the user to merge potentially duplicate guests to help clean up your guest book.
- When done, click ADD USER.
Steps for adding an existing user
If a user is already assigned to another restaurant, you can also give them access to other restaurants. This is useful when managing multiple restaurants in Eat App.
- Click ADD EXISTING USER.
- Enter the email address of the existing user and click FIND USER.
Review the search results which display the user’s details, role, functions, and the restaurants they currently have access to. - Click ADD USER to complete the process.