What does your booking widget look like?

Setting Up Your Restaurant for Online Reservations
The following steps will get you up and running and ready to receive bookings from the web.
1. Edit your online hours
The first and most important step in setting up your online booking widget is ensuring your restaurant's hours are correctly defined. This means setting up your shifts.
By default, your restaurant is given a default shift, to learn more about how to set up your shifts correctly, read our article on shifts here.
2. Set up your Restaurant Layout
To learn more about setting up your restaurant layout, click here.
Once done, you are now ready to start generating reservations online at your restaurant.
Booking Widgets
Once your restaurant is set up to start receiving online reservations.
1. Navigate to the settings tab
2. Click Advanced Settings located in the upper right corner
3. Go to the "Widget" tab. This is where you will be able to access your various restaurant booking widgets
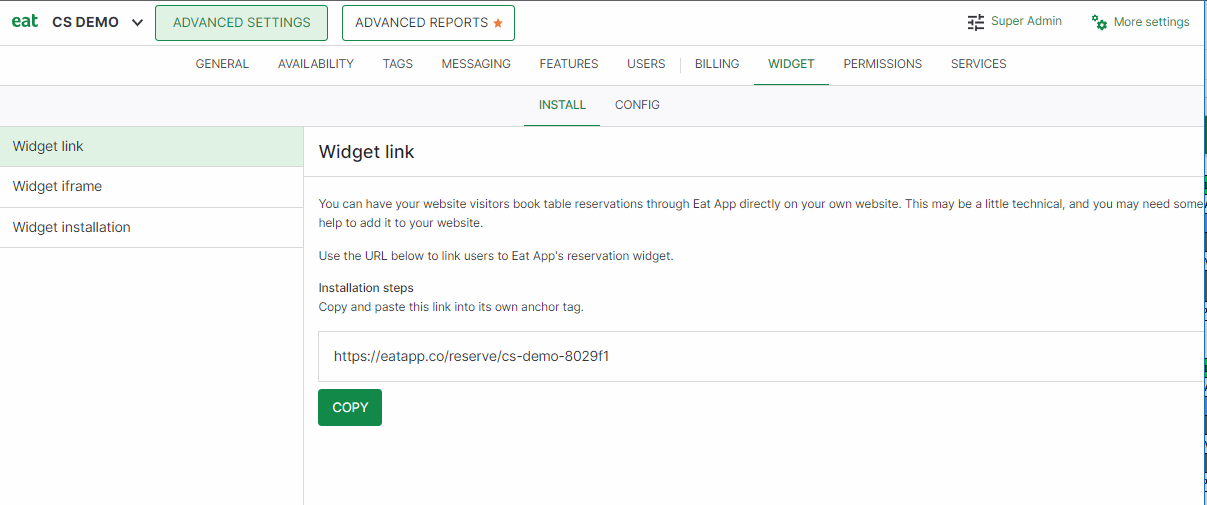
Widget link
This link can be used as a hyperlink anywhere on your website to generate reservations.
Widget Iframe
This is the code for an iframe that can be plugged into your website.
Popup Installation
This is the code to create a pop-up button that displays your booking widget.
Adding your widget across the web
To take full advantage of your restaurant booking widget, you'll want to place it on as many channels on the web as possible to make sure you are maximizing the potential of receiving online reservations. We recommend the following:
Your Restaurant Website
To add your booking widget to your website, you will need access to the website builder you used to put the site together.
Once logged in, you can create a hyperlink with a nice call to action, such as "Book now" or "Reserve your table" and your booking widget link. Alternatively, use your website builder's pre-built buttons to create a nicer user experience.
Facebook also provides restaurants with the option to add a large "Reserve" button right on the restaurant's Facebook page.
Adding the 'Reserve' button on your Facebook and Instagram pages directly through Facebook
- Log in to the Facebook page of your restaurant
- On the left-hand sidebar of your Facebook page, select "Business Apps."
- Scroll down to the "Reservations" category and locate "Eat App" and then click "Connect".
- You will then be taken to an authorization page from Eat App, where you'll need to select the restaurant you want to connect to.
- Once selected, you will be redirected back to Facebook, where you will need to connect your Instagram account, Ad account, and Facebook pixel (these three are required to complete the process).
- Your "Reserve" button will now be live on both your Facebook and Instagram profiles, and you can manage your booking widget settings directly from Eat App.
Adding the 'Reserve' button on your Facebook and Instagram pages from Eat App
- Log in to admin.eatapp.co with your restaurant's username and password
- Click on the "Services" tab once logged in and navigate to the "Instagram" tab
- Click on the "Setup" button. This will open a Facebook login page where you'll need to be logged into your restaurant's Facebook account
- Select ‘Continue’ when prompted to connect Eat App to Facebook
- Ensure that the correct Facebook Page is connected, along with the Instagram Profile, Ad Account, and Facebook Pixel, then select ‘Continue.’
- Allow the Eat App Integration to manage business extension and select ‘Next
- Your "Reserve" button will now be live on both your Facebook and Instagram profiles, and you can manage your booking widget settings directly from Eat App
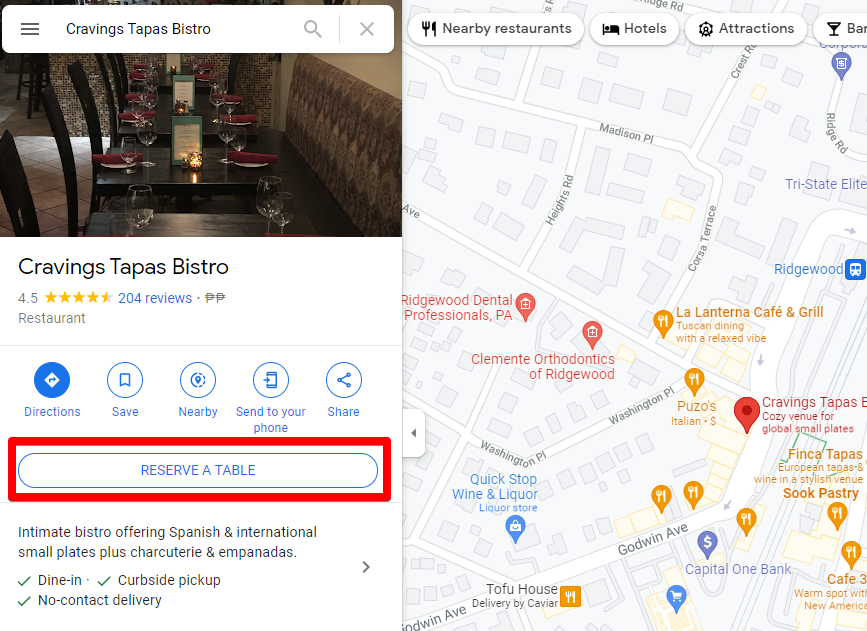
Google My Business Profile
Your Google My Business profile can also be a great way to acquire free restaurant reservations using the power of Google Search and Google Maps.
Please note that NOT all countries are supported on Google's "Reserve a Table" button. Here is the list of the Supported Countries
The steps below assume that you have already set up and claimed your Google My Business profile. In the event you haven't done this yet, click here to learn how.
Activating Google's "Reserve a Table" from EatApp's Advanced Settings
1. Log in to your Advanced Settings
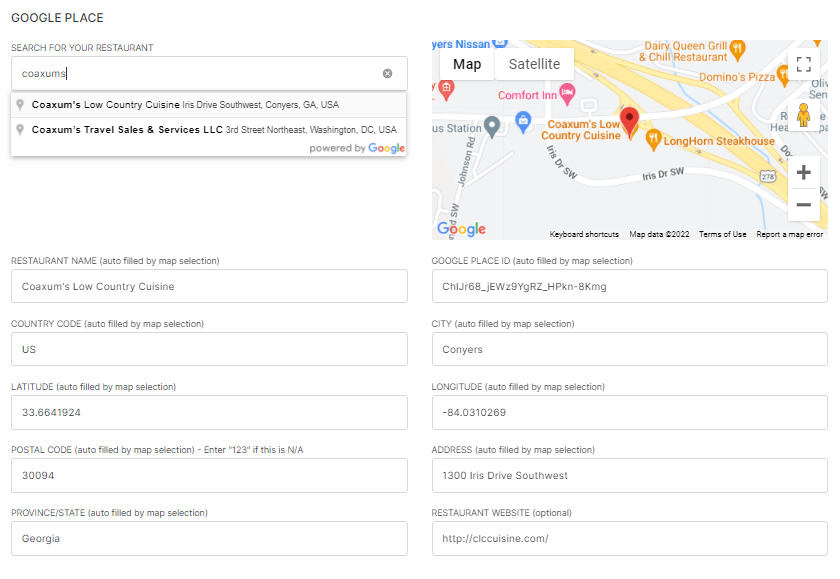
2. Go to the Services tab and click GOOGLE.
3. From here, type in your restaurant's name in the search field, and it will provide you with the results. Once you have chosen your restaurant, it will automatically populate the details of your restaurant.
4. Drag the Status switch to the right to enable the integration.

5. Click on "UPDATE INTEGRATION" to save the changes.
Note: It can take 8-24 hours before the integration is accepted by Google. Please check your Google My Business profile for the Reserve a Table button.
Adding your Widget URL from your Google My Business profile
Sign in to your Google My Business account. If you have more than one listing, choose the one you want to edit.
Click the URLs section, which, depending on what business category you are in might show additional URL options.
Enter your booking link into the Reservation field and click apply.
How will you know a reservation is from the web?
When a reservation is made online by one of your customers, it will automatically appear in your table management system. You will also automatically receive an email informing you that you have received a reservation from the web. In addition to this, there are three ways to distinguish online reservations from in-house reservations in Eat App.
-
By using the filters to only view online reservations

-
The booking will be marked with web icon

-
When you open the reservation details, the Booking Source will say "Web"

How to block or limit online reservations
To learn more about how to block online reservations, check out our articles on:
Payments from Online Reservations
If a reservation is placed online during a shift that is attached to a payment rule, your customer will be required to either prepay for the reservation or enter their credit card details.
To learn more about payments click here.
Messaging your customers about online reservations
Just like in-house reservations, when a customer makes a reservation online, they will receive email and SMS notifications across their entire journey from requesting a booking to it being confirmed, denied, or canceled.
To learn more about messaging click here.